 Department for Culture, Media and Sport
Dr George Hay, from the National Archives, outlines his research into the Battle of Amiens
The 4th and 11th Australian Infantry Brigade belonged to the 3rd Australian Division. They were to be supported in the opening stages of the battle by 5th Tank Brigade on the extreme left of the main Australian-Canadian spearhead, butting up against the River Somme and on the flank of British III Corps on the opposite bank. The ground they had to cross was difficult and broken in places by mud, undergrowth, spurs and steep gullies. Nonetheless, they had meticulously prepared for the attack and maintained secrecy throughout, discreetly concentrating the infantry force behind the front and camouflaging tanks in the villages along the Somme valley.
Despite concerns raised by a strong enemy attack against the British 18th Division north of the river on 6 August, by 3.30am on 8 August the Australians had crept forward to their jumping off positions. The enemy remained unaware of the impending attack, and the soldiers had been guided through the darkness by taped tracks laid out by 11th Field Company, Australian Engineers. A heavy fog had helped conceal their movements, while repeated passes by RAF aircraft were used to drown out the rumble of tank engines as they crept forward towards the infantry start line.
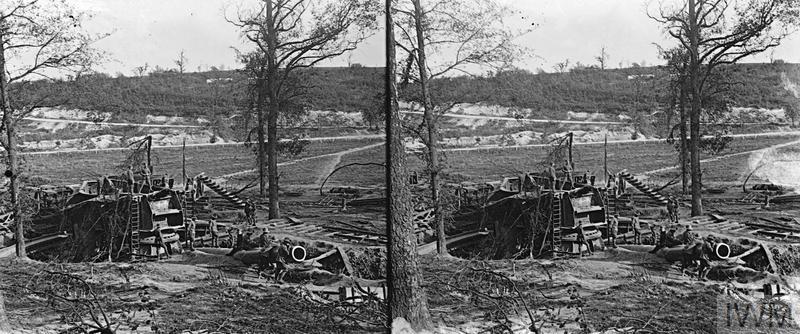
MINISTRY OF INFORMATION FIRST WORLD WAR OFFICIAL COLLECTION (Q 8287) The 380 mm gun of Chuignolles, captured by the 3rd Australian Battalion, 23 August 1918. The largest gun captured in the War (calibre 15 in, length 70 feet, range 24 miles). Used from July 1918 – August 9th for the bombardment of Amiens, when disabled by its gun crew. It was presented by its captors to the city of Amiens. Copyright: © IWM. Original Source: http://www.iwm.org.uk/collections/item/object/205244166
Zero hour
At zero hour – 4.20am – the creeping barrage of high-explosive shells began falling 200 yards in front of the attacking forces where it would stay for three minutes while the tanks of 13th Battalion, Tank Corps passed through the infantry to lead the assault. From here, the shelling moved ahead of the tanks in timed 100-yard ‘lifts’. Trading a lengthy preparatory bombardment for surprise increased the importance of the tanks and their 6-pounder guns and Hotchkiss machine guns. Nonetheless, as they moved forward, the 44th Australian Battalion of 11th Brigade reported enemy retaliation as ‘practically nil’ and that progress was easy going, while the tank battalions found the enemy surrendered as their machines emerged from the fog.
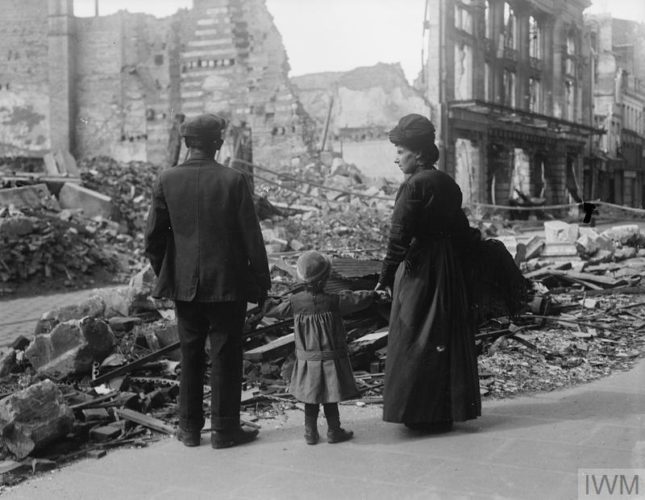
THE HUNDRED DAYS OFFENSIVE, AUGUST-NOVEMBER 1918 (Q 11341) A refugee family returning to Amiens, looking at the ruins of a house, 17th September 1918. Copyright: © IWM.
In spite of the poor visibility – down to 10 yards near the river – good leadership and initiative kept the men moving in the right direction and allowed the tanks to destroy most German strongpoints and machine gun posts before their occupants had time to rally. By 7.30am, 11th Infantry Brigade Headquarters heard that the first objective – the Green Line, at approximately 4,000 yards depth – had been captured and was being consolidated.
On to the red line
On schedule at 8.20am, the 4th Infantry Brigade began to pass through the 11th to continue the attack in the second phase on to the Red Line, this time supported just by the tanks as the artillery engaged in counter-battery fire . Functioning tanks from the first wave had rallied and refuelled in the Cerisy valley before taking positions for the next assault. Forming up 200 yards behind the tanks as the sun began to clear the fog, the Australians continued their attack. Despite stiff resistance in the villages of Bayonvillers and Cerisy, and fire from the high ground on the other side of the river that was yet to be captured by British III Corps, the Red Line was reached and secured according to the timetable.
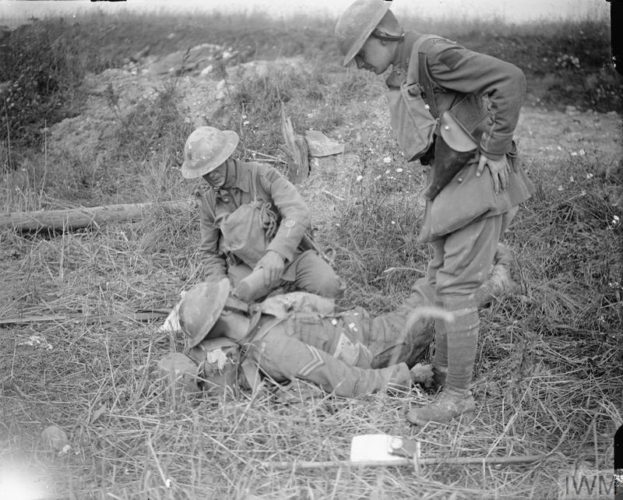
THE HUNDRED DAYS OFFENSIVE, AUGUST-NOVEMBER 1918 (Q 6910) Battle of Amiens. Two soldiers giving a drink to a wounded man of the 2/10th Battalion, London Regiment (Hackney), 58th Division, near Sailly Laurette, 8 August 1918. Copyright: © IWM.
The final phase
The final phase of operations for these formations on 8 August was a push to the outer Amiens defences – the Blue Line, some 10,000 yards in front of their start point. With the enemy largely on the run south of the river, a novel approach was again adopted, with each of the new, larger Mark V* tanks carrying machine guns and their crews directly to the objective ahead of the infantry. Not attempted before, this ensured the arrival of a strong preliminary attacking force. Although fire from the other side of the river made this final move among the most costly for the Australians and the tank crews, these forces pushed on and secured their objectives.
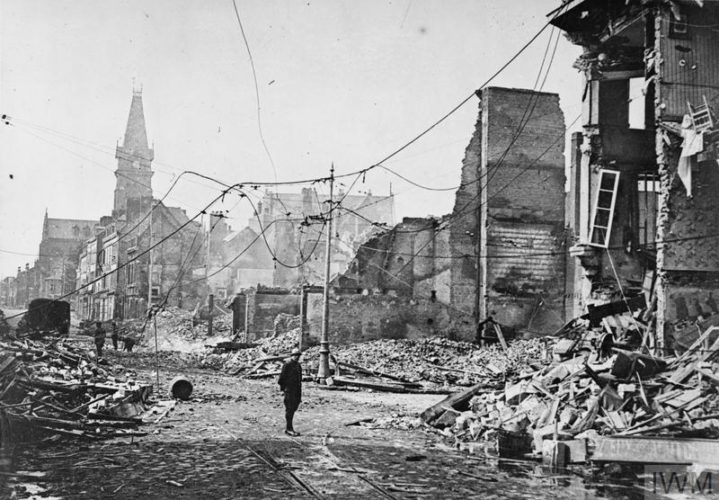
THE GERMAN SPRING OFFENSIVE, MARCH-JULY 1918 (Q 58186) Ruins of Amiens, 18 May 1918. On 23 April 1918 the Germans were only nine miles from Amiens. The civilians were evacuated on 9 April and the city was bombarded daily. Copyright: © IWM. Original Source: http://www.iwm.org.uk/collections/item/object/205307441
As the day closed, the Australians had routed their enemy and were in complete command of their objectives. The war diary of 16th Australian Battalion records that these operations were noteworthy not only because of the novel use of tanks and their sheer numbers, but because it was the first occasion the Australian Corps fought as one. Theirs was a significant contribution to the Allied armies’ success at Amiens, the battle that marked the beginning of the end of the war.
References
WO 95/103/6 – 15 Battalion, Tank Corps
WO 95/103/7 – 15 Battalion, Tank Corps War History
WO 95/112/2 – 5th Brigade, Tank Corps Headquarters
WO 95/115/2 – 13 Battalion, Tank Corps War History
WO 95/2017/3 – British 18th Division Headquarters, General Staff
WO 95/3430 – 11th Australian Infantry Brigade Headquarters
WO 95/3440 – 44th Australian Infantry Battalion
WO 95/3490 – 4th Australian Infantry Brigade Headquarters
WO 95/3498 – 15th Australian Infantry Battalion
WO 95/3503 – 16th Australian Infantry Battalion